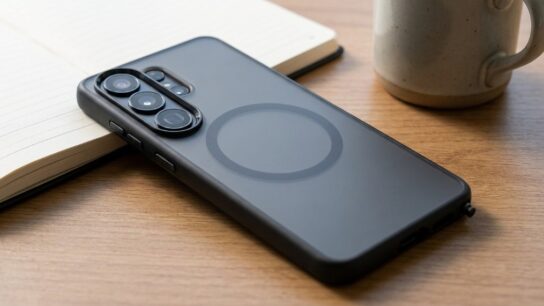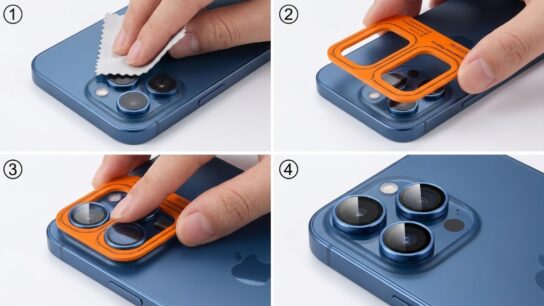
Installing the JAR OCO Magnetic Case for iPhone 13 takes less than a minute. Clean the phone, align the camera cutout, and press the edges until the case snaps into place. The magnetic ring inside lines up with the iPhone 13’s MagSafe magnets. That alignment matters more than force. Many people rush this step and end up with a crooked or loose fit. A close look at the JAR OCO Magnetic Case for iPhone 13 reveals the magnet ring and the camera opening. Those two features guide the entire process. Once the case sits flush, magnetic accessories attach cleanly.
The JAR OCO Magnetic Case for iPhone 13 installs by hand in under a minute. First, wipe the phone clean and remove any old case. Next, align the camera cutout and the magnetic ring with the iPhone’s MagSafe area. Then press each corner firmly until the case clicks into place. Finally, check that the buttons and ports line up. No tools or adhesive are required.
Key Takeaways
- Installation takes under a minute and needs no tools or adhesive.
- Align the camera cutout and magnet ring before pressing any corner.
- Clean the iPhone first so grit does not get trapped under the case.
- Test a MagSafe accessory after seating the case to confirm alignment.
- Remove and reseat the case if buttons feel stiff or the fit seems loose.
- Press corners gently near the camera to avoid cracking the lens cover.
What You Need Before You Start
You need very little to install this case. A clean microfiber cloth is the only useful tool. Remove any existing case, pop socket, or adhesive accessory first. Those items can block the case from seating fully. Also, check that your iPhone 13 is the correct model. The iPhone 13, 13 Pro, 13 Pro Max, and 13 mini each use different case sizes. A case built for the 13 Pro will not fit the standard iPhone 13.
Check the Model and Clean the Phone
Wipe the back glass and edges with a dry microfiber cloth. Pay attention to the camera bump area. Dust and lint collect there easily. If you use a screen protector, confirm it does not lift at the edges. A lifted protector can push against the case lip. That pressure makes the case feel tight or uneven. Once the phone is clean and dry, you are ready to install.
Step-by-Step Installation
The process follows four simple steps. Each one takes only a few seconds. Rushing any step usually causes a crooked fit. Follow the order below for the cleanest result.
Step 1: Prepare the iPhone
Hold the phone face down over a soft surface. A towel or desk mat prevents scratches if you drop it. Make sure the phone is powered off if you want to avoid accidental button presses. This step is optional but helpful for first-time installs.
Step 2: Align the Case
Lower the case onto the phone from the top edge first. Line up the camera cutout with the camera bump. Then check that the magnet ring sits centered on the back. The ring should sit flat against the iPhone’s MagSafe coil area. If it looks off-center, lift the case and try again. Do not force it down while misaligned.
Step 3: Press and Seat the Edges
Press the top two corners into place first. Then work your way down each side. Use firm but even pressure with your thumbs. You should hear or feel a soft click at each corner. Finally, press the bottom edge until the case wraps the phone fully. Avoid pressing hard directly over the camera lens.
Step 4: Verify the Fit
Run a finger along the entire edge of the case. It should sit flush with no gaps or raised spots. Check the mute switch, volume buttons, and power button. Each should press with a clear click. Also, look at the charging port opening. The Lightning connector should plug in without resistance. If anything feels off, remove the case and start again.
How to Confirm the Magnetic Ring Is Aligned
The magnet ring alignment is the most important part of this install. If it is off, MagSafe accessories will not hold well. To test it, attach a MagSafe charger or wallet to the back. It should snap into place with a firm pull. If the accessory slides or feels weak, the case is likely shifted. Remove the case and reseat it. A properly aligned ring holds accessories securely even during normal movement.
Common Installation Mistakes to Avoid
Most problems come from a few predictable errors. Avoiding them saves time and protects your phone.
- Pressing the case down before aligning the camera cutout.
- Trapping dust, hair, or lint between the case and the phone.
- Using excessive force near the camera lens cover.
- Ignoring stiff buttons instead of reseating the case.
- Installing the case over a thick screen protector that lifts at the edges.
Each of these mistakes is easy to fix. Simply remove the case, clean the phone, and reinstall slowly. Patience matters more than speed here.
Compatibility and Limitations
This case fits the standard iPhone 13, not the Pro or mini models. Always confirm the model number before buying. The case supports MagSafe accessories because of the built-in magnet ring. Wireless charging works through the case, but charging speed may drop slightly. Thicker cases naturally add more distance between the phone and the charger. If speed matters to you, test your charger after installation. Also, some third-party magnetic mounts may hold less firmly than Apple’s own MagSafe accessories.
Maintenance and Removal Tips
Removing the case correctly prevents stretching and cracks. Start at one bottom corner and peel it back gently. Work around the phone instead of pulling straight off. Never pry near the camera cutout. Clean the case every few weeks with a soft damp cloth. Mild soap and water work well. Avoid alcohol, acetone, or harsh cleaners. Those chemicals can dull the finish or weaken the magnet adhesive over time.
Troubleshooting Common Issues
If the case feels loose, check for trapped dust or a misaligned edge. Reseat it from the top corner down. If buttons feel stiff, the case may be slightly off-center. Remove it and try again with even pressure. If magnets feel weak, confirm the ring sits centered over the MagSafe coil. A case that still feels wrong after two attempts may have a defect. In that case, contact the seller for a replacement.
Frequently Asked Questions
Does the JAR OCO Magnetic Case for iPhone 13 support MagSafe?
Yes, the built-in magnet ring aligns with the iPhone 13’s MagSafe array for accessories and charging.
Can I use a screen protector with this case?
Yes, as long as the protector sits flat and does not lift at the edges.
How do I remove the case without damaging the phone?
Peel from one bottom corner and work around the edges gently with your thumbs.
Will the case work with wireless charging?
Yes, wireless charging works through the case, though speed may be slightly slower.
What should I do if the case feels too tight?
Remove it, check for trapped dust or a lifted screen protector, then reseat it slowly.
Conclusion
Installing the JAR OCO Magnetic Case for iPhone 13 is a simple process once you know the right order. Clean the phone, align the camera cutout and magnet ring, then press each corner firmly. Verify the buttons, ports, and MagSafe alignment before you start using it. If anything feels off, remove the case and try again. Take a minute to test a MagSafe accessory now, and enjoy a secure, well-fitted case every day.