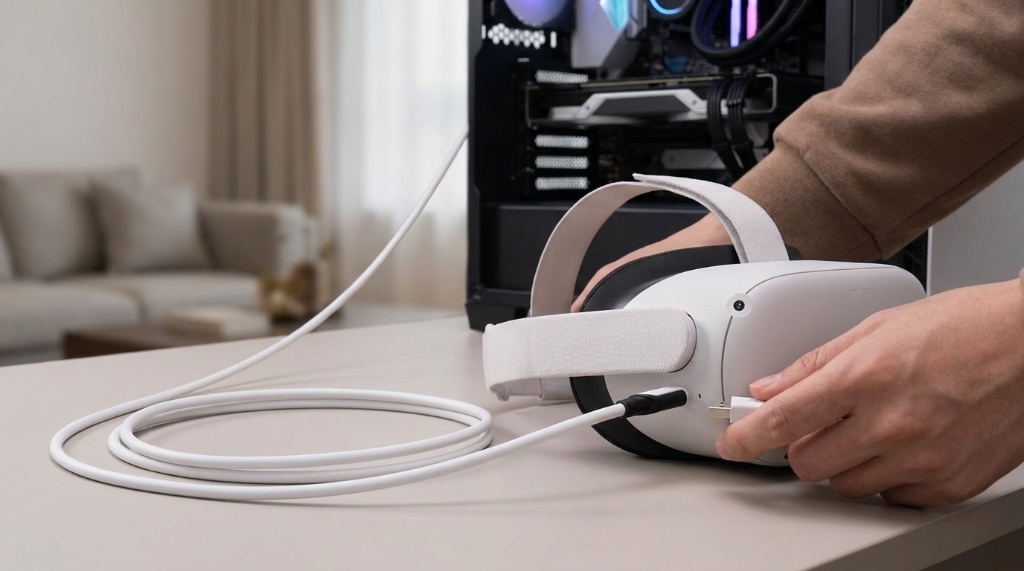
Using the Syntech Link Cable for Meta Quest 2 takes about five minutes. Plug the USB-C end into the headset, connect the other end to your PC, then enable Quest Link inside the headset. After that, you can play PC VR titles and view your desktop in VR. The cable also keeps the battery topped up during long sessions. Many people pick a third-party cable because it costs far less than the official one. A well-built Syntech Link Cable for Meta Quest 2 carries both data and power through a single cord. This guide covers setup, cable routing, performance settings, and the fixes that solve most connection problems.
Connect the cable’s USB-C end to your Quest 2 and the other end to a USB 3.0 port on your PC. Install the Meta Quest PC app, then put on the headset and choose Quest Link from the settings menu. If the cable is detected, your PC library appears in VR. If not, switch USB ports, check the cable orientation, and confirm your PC meets Meta’s graphics requirements.
Key Takeaways
- A USB 3.0 port matters more than cable length for stable Quest Link performance.
- The L-shaped connector should sit on the headset side to reduce strain on the port.
- Quest Link must be enabled inside the headset, not just on the PC app.
- Most connection failures come from USB 2.0 ports, loose plugs, or outdated graphics drivers.
- Air Link works without a cable, but it depends heavily on your Wi-Fi quality.
- Coiling the cable loosely after each session prevents internal wire damage.
What the Syntech Cable Actually Does
The cable carries two things at once: video and tracking data to your PC, and power back to the headset. That dual role is why a plain charging cable will not work for Quest Link. Charging cables often lack the data bandwidth needed to stream PC VR video.
Syntech’s version is built as a USB 3.0 data cable with an angled connector on one end. The angled plug is designed for the headset, where it sits flush against the side of the device. The straight end goes into your computer. Length options usually range from a few feet up to around 16 feet, which gives you room to move.
One practical detail matters here. Longer passive cables can lose signal strength. If you buy a very long cable, a USB 3.0 port and good shielding become more important, not less.
What You Need Before Connecting
Before you plug anything in, confirm your PC can actually run PC VR. Meta publishes supported GPU lists inside its PC app requirements, and most mid-range gaming cards from recent years qualify. Integrated graphics usually do not.
You also need a few basics in place:
- Windows 10 or Windows 11 on a desktop or laptop
- The Meta Quest PC app installed and signed in with the same account as your headset
- At least one free USB 3.0 port, ideally on the back of a desktop tower
- A charged headset, since setup drains the battery faster than normal
Front-panel ports on desktop cases sometimes run through weaker internal wiring. If you have a choice, use a rear port first. On laptops, avoid unpowered USB hubs entirely.
Step-by-Step Setup for Quest Link
Follow these steps in order. Skipping ahead usually creates confusion about which side failed.
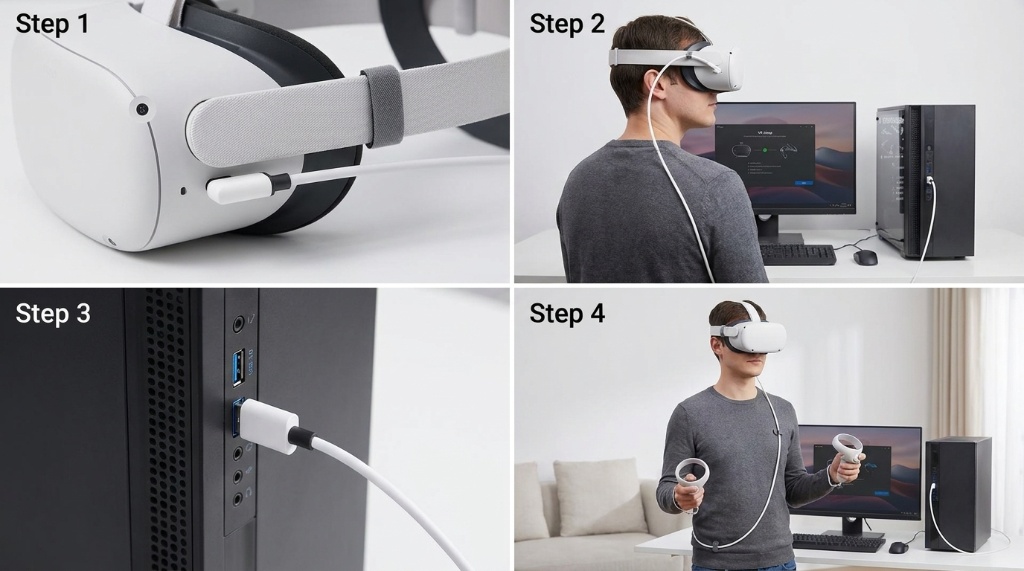
- Install the Meta Quest PC app on your computer and complete the initial setup.
- Plug the angled USB-C connector into the left side of your Quest 2.
- Plug the other end into a USB 3.0 port on your PC.
- Put on the headset and open the Settings menu from the universal toolbar.
- Select Quest Link, then choose Launch Quest Link.
- Allow the headset to detect your PC, then confirm the connection on screen.
- Open the PC app on your desktop and start a VR game from your library.
Once Link launches, you land in a virtual home environment. From there, you can open your desktop view, launch SteamVR titles, or switch back to standalone mode at any time. The headset charges while connected, though charging speed depends on your port’s power output.
Getting the Most Out of Your Cable Connection
Performance problems with Quest Link are usually settings problems, not cable problems. Start with the resolution and refresh rate sliders in the PC app. Higher settings look sharper but demand more from your GPU.
If you see stuttering, lower the render resolution before you blame the cable. Then check the refresh rate. Quest 2 supports 72Hz, 80Hz, 90Hz, and 120Hz over Link, and not every PC can hold the higher rates.
Cable routing also affects comfort and reliability. Run the cable up your back and over your shoulder rather than letting it hang in front. A small clip or a velcro strap on the headstrap keeps the plug from tugging. Give yourself a little slack near the headset so quick head turns do not yank the connector.
Link Cable vs Air Link vs Official Cable
You have three realistic options for PC VR on Quest 2. Each one trades convenience against stability in a different way.
| Option | Best For | Main Trade-Off |
|---|---|---|
| Syntech Link Cable | Long sessions and competitive play | You stay tethered to the PC |
| Official Link Cable | Users who want first-party hardware | Typically costs significantly more |
| Air Link | Room-scale movement with no cord | Depends on strong, uncrowded Wi-Fi |
The cable route wins when latency and consistency matter. Air Link wins when freedom of movement matters more than a perfectly stable image. Many people keep both options available and switch depending on the game.
Common Problems and How to Fix Them
If Quest Link does not detect your PC, work through these checks in order. Most issues resolve within the first two or three.
- USB 2.0 warning: move the cable to a different port, preferably a blue or labeled USB 3.0 port.
- No connection at all: unplug both ends, wait ten seconds, and reconnect firmly.
- Flickering or black screen: update your graphics drivers and lower the render resolution.
- Frequent disconnects: remove extension cables and USB hubs from the chain.
- Headset battery draining: use a rear motherboard port that supplies more power.
- Poor tracking: improve room lighting and clean the headset’s tracking cameras.
Restarting the PC app fixes a surprising number of detection failures. So does rebooting the headset by holding the power button. If nothing works, test the cable on another computer to rule out a hardware fault.
Mistakes That Shorten Cable Life
Link cables fail most often at the connector, not in the middle of the wire. Yanking the plug out by the cord is the fastest way to break it. Always grip the metal housing when unplugging.
Storage habits matter too. Wrapping a cable tightly around your hand creates sharp bends that crack the internal shielding over time. Instead, coil it loosely into a circle about the size of a dinner plate. A simple velcro tie holds the loop without pinching.
Finally, avoid running the cable across chair wheels or under a desk edge. Repeated crushing damages the conductors even when the outer jacket looks fine.
When You Might Not Need a Link Cable
Not everyone needs a tethered setup. If you mainly play standalone titles from the Quest store, the cable adds nothing. Those games run directly on the headset.
Air Link and Virtual Desktop are also worth trying first if your router supports Wi-Fi 6 and sits in the same room as your play space. A clean 5GHz connection can feel close to wired for slower-paced games. Fast-paced shooters and simulators still benefit most from a physical cable.
Frequently Asked Questions
Does the Syntech Link Cable charge the Quest 2 while playing?
Yes, it passes power to the headset during play, though the battery may still drain slowly during demanding PC VR sessions.
Can I use the cable with a laptop?
Yes, as long as the laptop meets Meta’s graphics requirements and has a working USB 3.0 port.
Why does my PC say the cable is USB 2.0?
The port or an adapter in the chain is limiting the connection, so try a different USB 3.0 port directly on the motherboard.
Is a longer cable worse for Quest Link?
Longer passive cables can weaken the signal, so shorter runs tend to be more reliable unless the cable is well shielded.
Do I need the official cable for Quest Link to work?
No, Quest Link works with any quality USB 3.0 data cable that meets the bandwidth and power requirements.
Conclusion
Setting up the Syntech Link Cable for Meta Quest 2 comes down to three things: a USB 3.0 port, a firm connection on both ends, and Quest Link enabled inside the headset. Once it works, keep the cable routed over your shoulder and coiled loosely between sessions. If something fails, check the port and drivers before replacing hardware. Start with the steps above, then launch one PC VR title to confirm everything runs smoothly.