
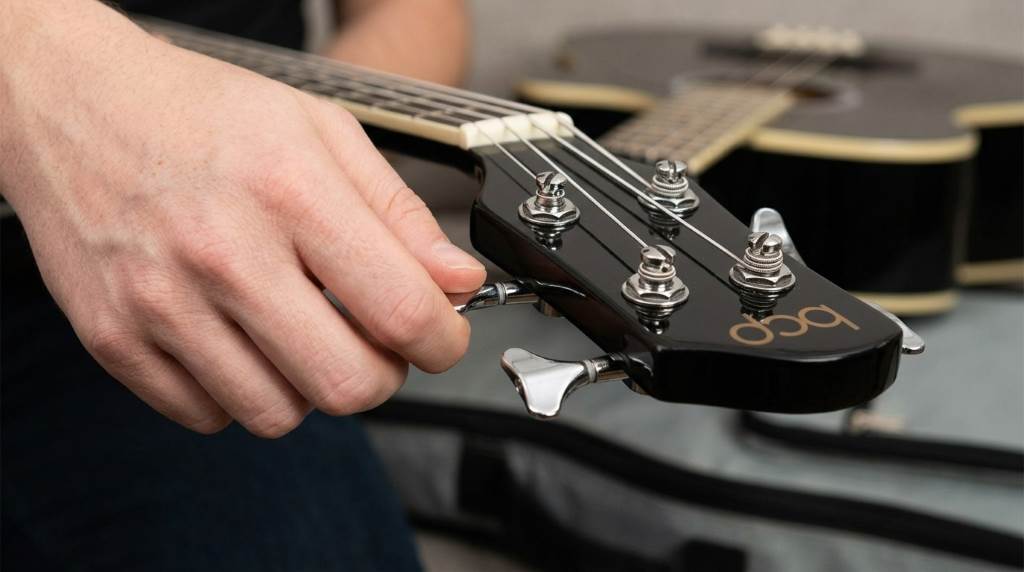
Tune a bass guitar by matching each string to its correct pitch: E, A, D, and G. Use a reliable electronic tuner, adjust each tuning key carefully, and check every string twice for accuracy. Proper tuning improves tone, playability, and overall performance.
Many beginners struggle with tuning consistency during practice sessions. However, a correctly tuned Choice Products bass guitar delivers clearer notes and better learning results. Studies suggest that musicians with properly tuned instruments develop pitch recognition faster. Therefore, learning accurate tuning methods remains an essential bass guitar skill.
Why Proper Bass Guitar Tuning Matters
A bass guitar creates the foundation of most musical arrangements. Consequently, even minor tuning errors can affect an entire performance. Accurate tuning helps every note sound balanced and intentional.
Proper tuning also protects your practice progress over time. Furthermore, it allows you to hear techniques correctly while developing muscle memory. Consistent tuning builds confidence during rehearsals and performances.

Understanding Standard Bass Guitar Tuning
Most four string bass guitars use standard tuning. Each string follows a specific pitch sequence from lowest to highest. Learning this order simplifies the entire tuning process.
- E string: Lowest and thickest string
- A string: Second lowest string
- D string: Third string
- G string: Highest and thinnest string
Remember this sequence before making adjustments. As a result, you reduce tuning mistakes and improve efficiency.
Tools Needed for Accurate Tuning
Several tools can help you tune a bass guitar correctly. Nevertheless, electronic tuners remain the easiest option for most players. They provide quick and accurate pitch detection.
- Clip on tuner
- Pedal tuner
- Smartphone tuning app
- Chromatic tuner
- Reference pitch source
Choose a tuner that responds quickly to low frequencies. Additionally, ensure the device detects bass notes accurately. Better tools generally produce more reliable tuning results.
How Bass Guitar Tuning Machines Work
Each tuning key controls string tension on the headstock. Tightening a string raises its pitch. Conversely, loosening a string lowers the pitch.
Understanding this relationship prevents accidental overtightening. Moreover, gradual adjustments help maintain string health. Small turns usually create noticeable pitch changes.
Step By Step Guide to Tune a Choice Products Bass Guitar
Step 1: Turn On Your Tuner
Start by activating your electronic tuner. Then place it where you can easily view the display. A clear reading improves tuning accuracy.
Make sure the tuner recognizes bass frequencies correctly. Otherwise, readings may become inconsistent during adjustments.
Step 2: Tune the Low E String
Pluck the thickest string gently and watch the tuner display. The target note should be E. Adjust the tuning key until the indicator centers.
Avoid turning the peg too quickly. Instead, make small adjustments and recheck frequently. This approach prevents overshooting the target pitch.
Step 3: Tune the A String
Move to the second string and pluck it clearly. The tuner should display A when properly tuned. Continue adjusting until the reading stabilizes.
Listen carefully while tuning. Additionally, watch for fluctuations caused by aggressive plucking. Consistent picking improves measurement accuracy.
Step 4: Tune the D String
Next, tune the third string to D. Follow the same method used previously. Small corrections usually deliver the best results.
Allow the note to ring naturally after plucking. Therefore, the tuner receives a cleaner signal and provides better feedback.
Step 5: Tune the G String
Finally, tune the highest string to G. Since thinner strings react faster, make adjustments carefully. Precise movements prevent unnecessary corrections.
Once the tuner indicates perfect pitch, stop adjusting immediately. Overcorrection often creates additional tuning challenges.
Double Check Every String
String tension changes can affect neighboring strings during tuning. Therefore, always revisit each string after completing the process. This habit improves overall tuning accuracy.
Start again from the low E string and move upward. Usually, only minor corrections remain necessary. The second pass ensures consistent pitch stability.
Using Harmonics for Fine Tuning
Experienced players often use harmonics to verify tuning precision. Harmonics produce clear reference tones that reveal subtle pitch differences. Consequently, they help identify tuning inconsistencies.
Lightly touch the string above the fret marker and pluck gently. Compare harmonic pitches between strings for additional confirmation. This method improves tuning accuracy significantly.
Common Tuning Mistakes to Avoid
Many beginners make avoidable tuning errors during practice sessions. Fortunately, awareness helps prevent most of these problems. Better habits produce faster improvements.
- Tuning without a reference pitch
- Turning tuning keys too aggressively
- Ignoring string stretching
- Skipping the final tuning check
- Using weak tuner batteries
Avoiding these mistakes leads to more reliable tuning sessions. As a result, your bass remains stable for longer periods.
How New Strings Affect Tuning Stability
Fresh strings often stretch during their first few sessions. Therefore, they require more frequent tuning adjustments. This behavior remains completely normal.
Gently stretch each string after installation. Then retune the instrument several times. Eventually, the strings settle and maintain pitch more effectively.
Signs Your Bass Guitar Needs Tuning
Several indicators suggest your bass has drifted out of tune. Recognizing these signs helps maintain better sound quality. Quick corrections prevent larger performance issues.
| Sign | Meaning |
|---|---|
| Notes sound dull | Pitch may be too low |
| Chords sound uneven | One string may be incorrect |
| Practice tracks sound wrong | Tuning mismatch exists |
| Frequent buzzing | String tension may vary |
Tips for Maintaining Accurate Tuning
Consistent maintenance improves tuning reliability throughout the year. Small preventive actions often make a noticeable difference. Good habits save time before every practice session.
- Store the bass in stable temperatures
- Clean strings after playing
- Check tuning before every session
- Replace worn strings regularly
- Inspect tuning machines periodically
These simple practices support long term tuning stability. Consequently, your instrument remains more dependable during practice and performance.
Conclusion
Learning how to tune a Choice Products bass guitar starts with understanding standard tuning and using a reliable tuner. Careful adjustments, regular checks, and proper maintenance create consistent results. Master these habits, tune before every session, and enjoy clearer tone, better accuracy, and greater confidence while playing.
Frequently Asked Questions
How often should I tune my bass guitar?
You should check tuning before every practice session or performance.
What is the standard tuning for a four string bass?
The standard tuning is E, A, D, and G from lowest to highest string.
Can I tune a bass guitar using a smartphone app?
Yes, many modern tuning apps provide accurate bass guitar tuning.
Why does my bass go out of tune quickly?
New strings, temperature changes, or loose hardware commonly cause tuning instability.
Should I tune up to the note or down to the note?
Tuning up to the target note generally provides better tuning stability.